
DIY: Chalkboard Mini Fridge
I used to be far more into “DIY’s” (insert *before kids* here), and now it is far more limited as the perceived time and energy crushes my motivation. While the thought of it is great and always inspiring, the getting it done part is where I struggle for success. I do love making things and the feeling of accomplishment is truly so great.
When I moved into my new office space I quickly realized I would need a little fridge. I had left a space open for such a purchase however I was not keen on having a typical stainless front appliance in my school house style office.
I decided to take on the DIY of painting the front of it with chalkboard paint. After procrastinating for weeks, I received a call about photographing my office which of course lit a fire under my butt to get it done.
The longest part was waiting for the paint to dry so to speak, and all in all it was so simple, I’m kicking myself for waiting so long. Isn’t that always how it goes?
Here’s the before:
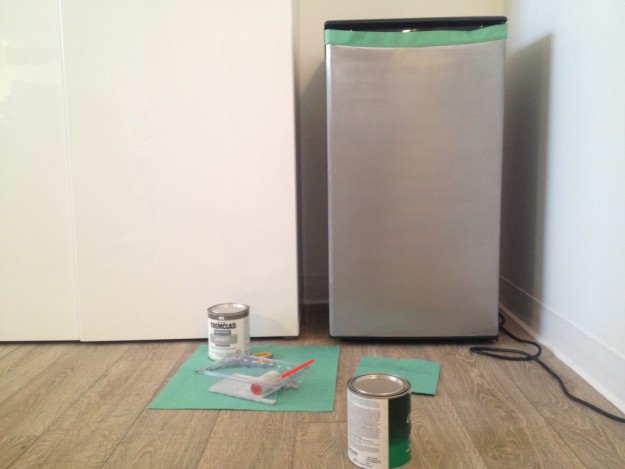
Supplies:
Sandpaper, painters tape, metal primer, paint brushes, rollers and trays. I purchased all of mine at Canadian Tire.

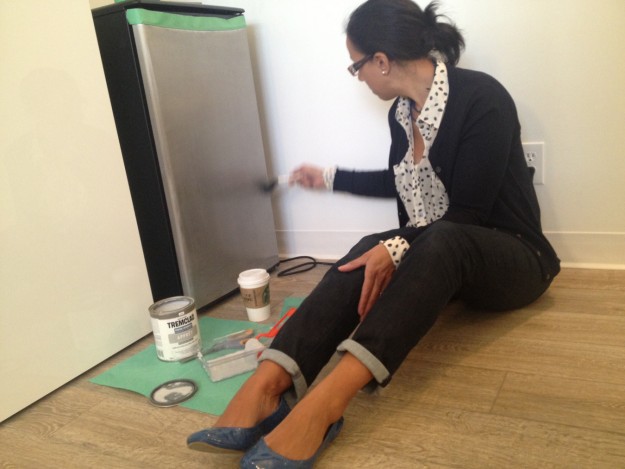
Step 1: Ensure the surface is clean
Step 2: Prepare the surface for the primer by sanding all areas with a medium grit sandpaper.
Step 3: Mask off any areas you do not wish to cover with chalkboard paint.
Step 4: Apply 2 coats of primer with a brush, allowing to dry for approximately 12 hours between each coat. Apply as even as possible and ensure all areas have been covered. Note: the primer is much runnier than expected and goes on quite thin.
Step 5: Apply chalkboard paint with a small roller brush for even application. After the first coat it may look messy and uneven. Not to worry, each coat you apply will offer more coverage and eventually be a solid chalkboard surface.
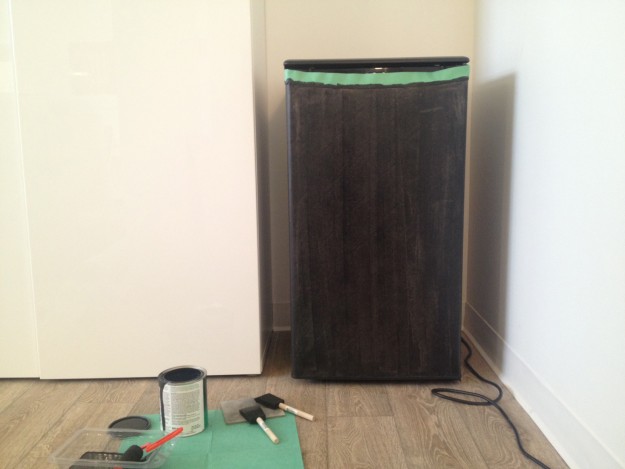
Step 6: Allow 24hrs between coats. Apply as many coats as necessary to achieve a smooth finish.
Step 7: Once completely dry, prime the surface with a thin layer of chalk by rubbing a lightly chalk dusted brush all over the surface. This will make erasing and re-creating on your board easier.
Step 8: Let your creative juices flow with drawings, text or both!
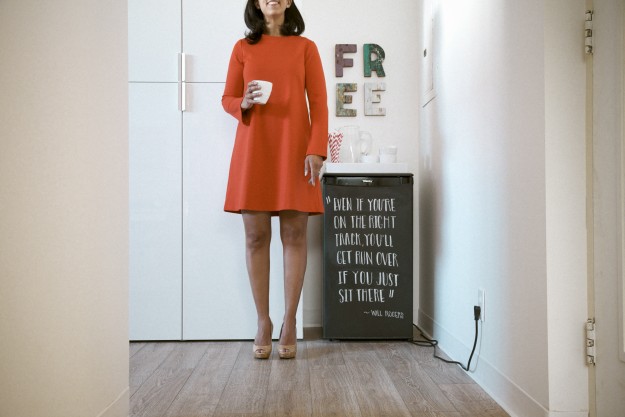
Ta-da! It turned out great. So pleased with the results.
‘After’ photo taken by Lori Andrews.