DIY: Coffee Filter Flower Garland

Our Dinner x Design table scape received countless questions about the hanging rose petal garden installation we created above the table. So much so, we decided to prepare a step by step DIY guide. We dyed 600 coffee filters and used roughly 500 in our installation. The outcome was incredibly dramatic, more so than we anticipated, and we too were quite smitten with the result. We hope you find this tutorial useful should you decide to channel your inner creative and take on the simple yet dramatic task of dying this ever so popular household item.

Image credit: Phil Crozier
step one
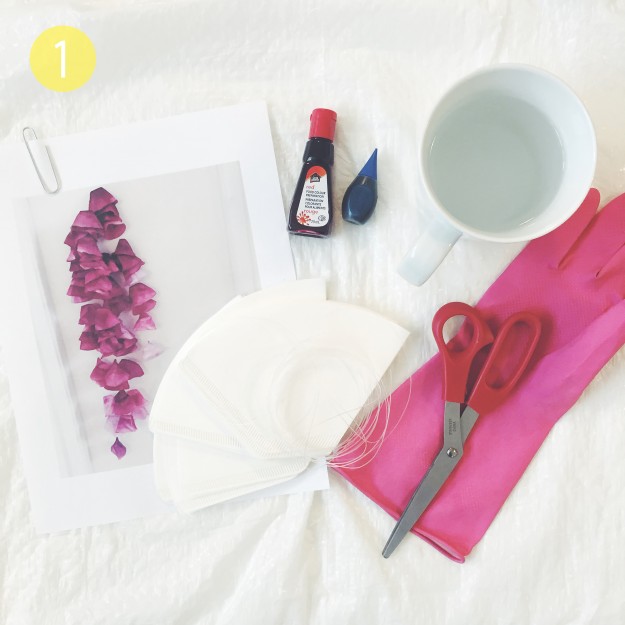
you will need:
• food colouring, a minimum of two packages (we used clubhouse brand from superstore, blue, red, yellow and their unique purple from the neon collection) buy enough to manipulate the colour, the more food colouring the higher the saturation of colour
• gloves (as fitted as possible)
• water
• large coffee cup or tupperware container
• pitcher of water on hand, in order to dilute colour as needed
• coffee filters (we used superstore no name brand no. 2, they are smaller in scale and create a realistic feel)
• 2-3 garbage bags. place over the surface you are using to dye the coffee filters, you will also need this space to allow them to dry
*finally, wear clothing that you don’t mind getting dirty, the food colouring will stain
step two
• while wearing gloves, begin by adding food colouring to the water. dip coffee filter into liquid mix to test the colour. this will enable you to find the right balance in colour ratio. we used roughly:
5 parts red
3 parts neon purple
2 parts blue
1 part yellow.
• use artistic licence when testing the colours, they don’t all have to be perfect!
• variation in colour creates visual interest. also, remember the coffee filters will always dry to a lighter colour, therefore don’t be afraid to use a lot of food colouring.

• once you are satisfied with the colour, begin by dying 5-10 coffee filters at a time, dipping them into the coloured water. once all of the filters are saturated, lift out of the liquid and drain the excess by pressing them with your hands. set filters aside.

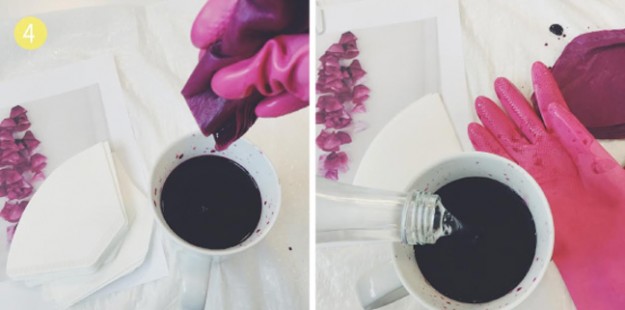
step four
• the dye mixture will slowly deplete after each 5-10 filters have been saturated. depending on the number of coffee filters you wish to make, dilute the food colouring solution, which will alter the colour, lightening each batch to create a natural ombre effect.
step five
• once you have used all the coffee filters or have simply run out of food colouring mix, open up the filters and prop them up like tents on the garbage bags. this allows them to dry in a open position creating a flower-like effect. allow a minimum of 4 hours for filters to completely dry.

• when the coffee filters are completely dry it’s time for the stringing process. you will need
-fishing line (we used 20lb)
-scissors
-safety pin or paper clip

• depending on desired length, take 8-10 coffee filters choosing ones that vary in colour saturation and hue. line them up on the table, arranging them in the preferred order.

step eight
• begin by taking your safety pin or paper clip and poking a small hole at the peak/highest point of the coffee filter. take a piece of fishing line approx. 4-5 ft. long and tie a knot at the end. thread the fishing line through the coffee filter so the opening faces downward.

step nine
• irregularly place the coffee filters along fishing line, becoming more concentrated at the top. this gives more volume as well as creates an organic feel.

Repeat until desired number of garlands has been reached. Now sit back and admire your hard work and creative genius. Well done!

Thank you to Adrienne who put this DIY together, photographing and note taking along the way. Adrienne also dyed all 600 coffee filters for our Dinner x Design installation and as mentioned they were the pièce de résistance.