How to Create a Gallery Wall
I love gallery walls. So much so, we have two in our home. One in the basement that is comprised of family photos and another in our youngest daughter’s bedroom that I’m sharing with you today! Whether family photos, curated art or a mix of both, creating a wall full of memories, momentos and memorabilia is the perfect way to celebrate life.
As you may know, we’ve recently renovated our home, during which our girls bedrooms received a minor update. New closets, new carpet and a fresh coat of paint. With that meant we could take a new approach to the rooms. Our youngest had the biggest change as we repositioned the furniture, in turn creating a new wall for the gallery wall. I set out to install it myself and here are my top tips!
Gather Photos & Memorabilia
This part might, in fact, take the longest. Whether photos, images, art pieces or artifacts, collecting items to display on a gallery wall takes time and thought. It may be a case of vetting years of photos to find your favourite ones, or compiling special art pieces collected over time, curating a gallery wall is no small feat. Don’t let that deter you though, this process can be fun and rewarding when all the hard work is done!
Create Layout
Once you have all of your photos, prints and memorabilia gathered together, it’s time to start planning the layout. This can be as structured or organic as you’d like. Map out the rough size of the wall the gallery will be displayed on and begin laying out each piece within this space. Play around with the organization and layout until you’re happy with it. Mix and match the scale, as well as the colour story. I took a stacked approach (shown below), creating five rows of all sorts of photos and imagery.

3. Confirm Supplies
Here’s a list of supplies you’ll need to install your gallery wall:
kraft paper
scissors
picture hanging kit (with various hanging styles)
hammer
pencil and eraser
painters tape
tape measure
level
4. Cut Templates
Now that you have your layout organized on the floor, it’s time to put it on the wall. Trace each item on kraft paper and cut out the respective shape. I also labelled each cut out so I knew which image/photo it belonged to.

5. Tape Cutouts to Wall
Once all of your templates are cut out, it’s time to recreate the layout on the wall. I started with the middle row and then worked my way left and right. 2” - 2 1/2” is ideal spacing between each frame top to bottom. The spacing left to right will vary depending on the dimensions of each piece. Don’t worry if you end up with more spacing on some as this helps to create a visual appealing gallery wall.


6. Hang Art/ Photos Accordingly
Some hanging mechanisms require a hook, others a nail. Plan carefully by measuring twice and hammering once. Most small frames or pieces of art are light enough they don’t require an anchor however double check the weight especially if you are hanging a mirror or anything on the heavier side.
Remove each piece of kraft paper and replace with the photo or piece of art. Having the template to work from gives you the confidence to hang the piece exactly where you planned to. Be sure you’re centring the hooks as best as possible.
7. Great work!
Well done! Now stand back and admire your efforts in creating a carefully crafted, and curated gallery wall.
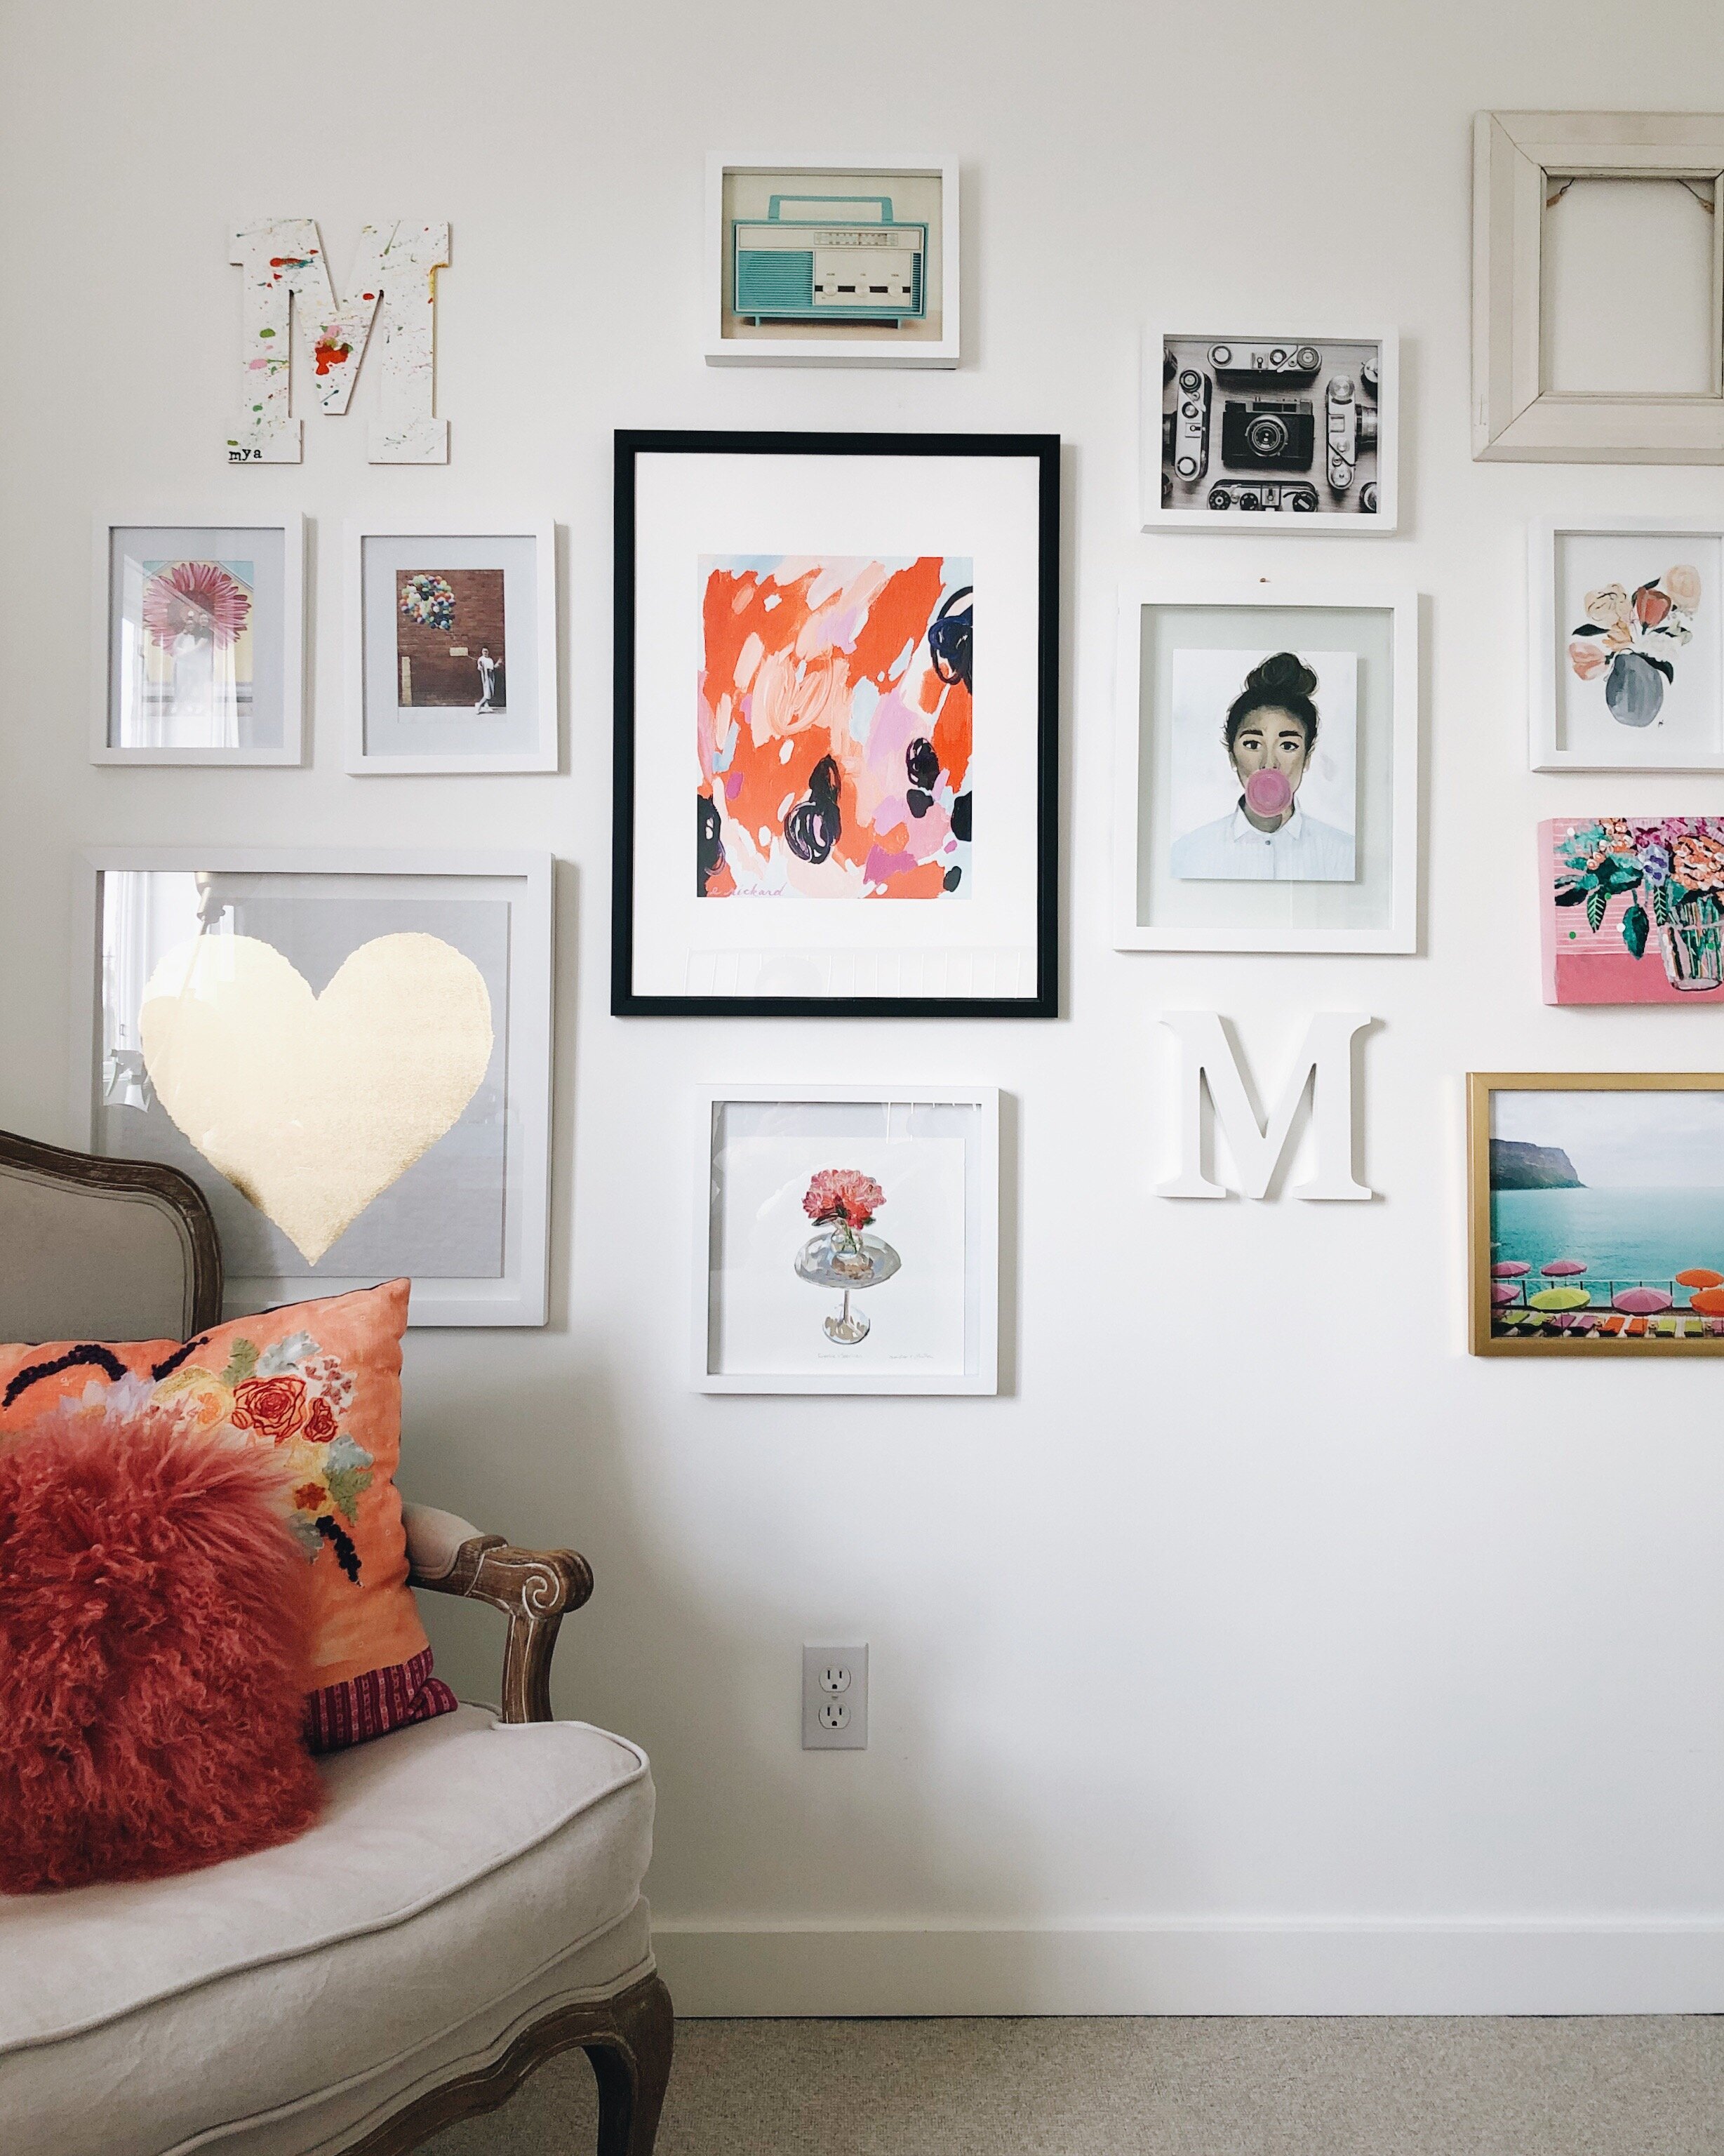
I found the process of pulling together this gallery wall methodical and enjoyable. From finding the right pieces to creating the layout and then finally hanging the items. I had a sense of accomplishment and I love to stand back and look at all of the fun pieces we put together on this wall.
Whether a bedroom or a hallway, gallery walls are a great way to add self expression and personality to your home. Looking for more inspiration? Check out 4 Areas to Hang a Gallery Wall !
Above all, have fun!